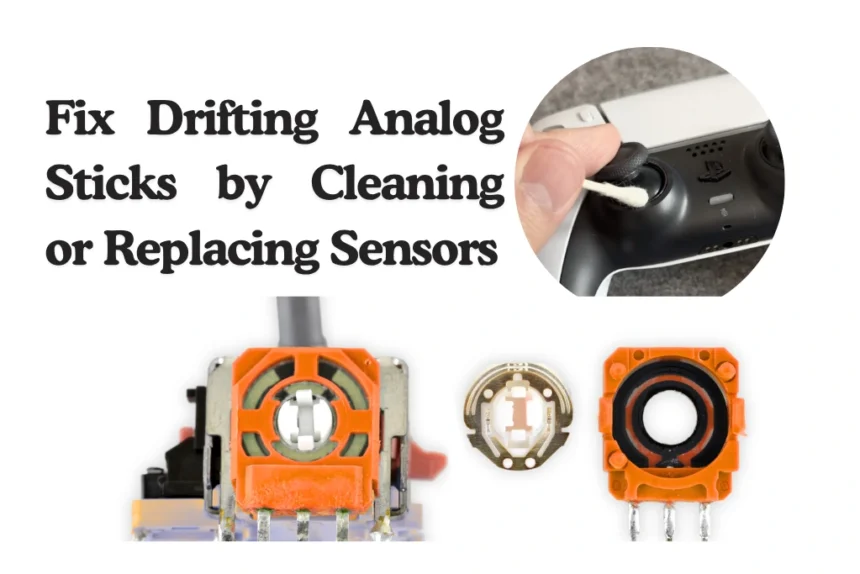
Analog stick drift is one of the most common problems gamers face today. Even a well-maintained controller can develop drift over time, where the character or cursor moves without any input. This can happen in any controller, including PlayStation, Xbox, Nintendo Switch, or third-party devices. Drift is usually caused by dirt buildup, worn-out potentiometers, or faulty sensors. Fixing it requires careful cleaning, calibration, or sometimes full replacement of the sensors.
What Causes Analog Stick DriftCausesTools and Materials NeededCleaning Analog Stick SensorsCleaning TipsLubrication and Mechanical MaintenanceLubrication ChecklistCalibration TechniquesCalibration Tips and GuidesReplacing Analog Stick SensorsReplacement ConsiderationsPreventing Analog Stick DriftPreventionTroubleshooting Persistent DriftTroubleshootingExpert AdviceAdditional Tips for Long-Term UseConclusionExtra Fix Recommendations for Analog Stick Drift:Watch Tutor To Fix Stick Drift On PS5 Controller!
Understanding why drift occurs is the first step to solving the problem. Analog sticks rely on sensors called potentiometers that detect movement. When dust, debris, or moisture gets inside, it can interfere with these sensors. Over time, mechanical wear or misalignment can also cause drift, making the stick register movement even when untouched. Knowing the source of the issue will help you apply the right solution rather than guessing, which can damage your controller further.
What Causes Analog Stick Drift
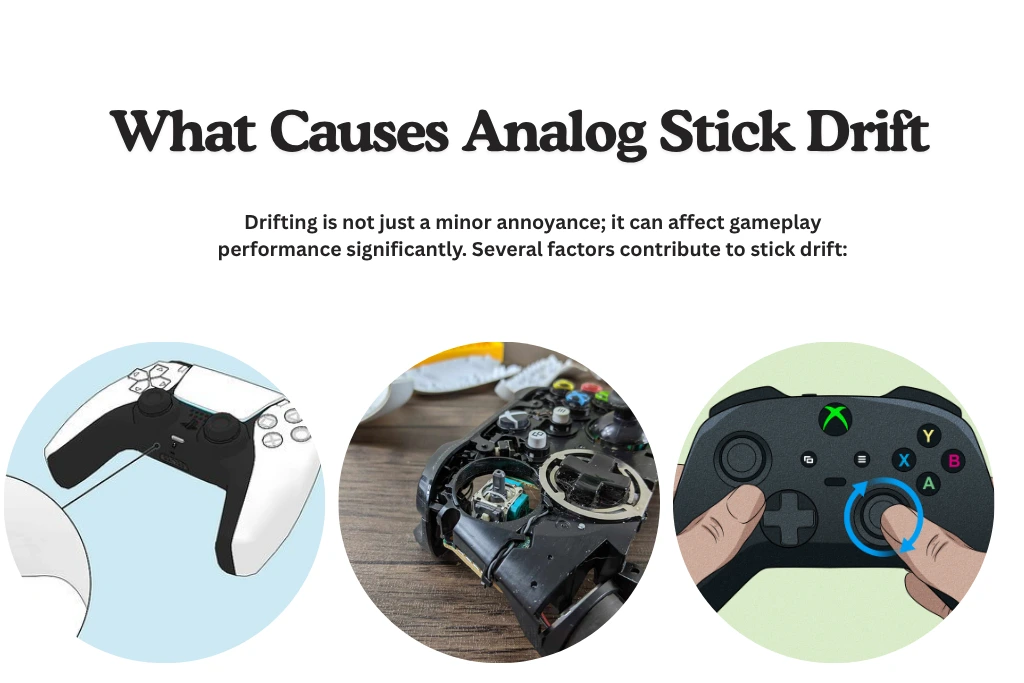
Drifting is not just a minor annoyance; it can affect gameplay performance significantly. Several factors contribute to stick drift:
- Dust and debris accumulation inside the stick mechanism.
- Moisture or sweat seeping into the sensors.
- Worn-out potentiometers or springs inside the analog stick.
- Misaligned internal components after repair or cleaning.
- Faulty sensor connections on the circuit board.
Understanding these causes allows gamers to prevent drift in the future. In many cases, regular cleaning and light maintenance can extend the lifespan of your analog sticks and sensors.
Causes
| Cause | Description | Effect on Gameplay |
|---|---|---|
| Dust accumulation | Tiny particles build up inside the stick mechanism | Stick may register input without touching |
| Moisture | Sweat or liquid gets inside | Sensors become sticky or unresponsive |
| Worn components | Springs and potentiometers lose precision | Drift occurs gradually over time |
| Misalignment | Internal parts shift during repair | Stick may feel off-center or stuck |
| Faulty sensors | Electrical contacts degrade | Movement detected incorrectly, drift appears |
Experts in controller repair recommend addressing drift issues as soon as symptoms appear, instead of waiting until full failure occurs.
Tools and Materials Needed
Before attempting a fix, gather the following tools to avoid damaging your controller:
- Small Phillips and flathead screwdrivers for disassembly
- Tweezers for precise component handling
- Cotton swabs and microfiber cloths for cleaning
- High-purity isopropyl alcohol (at least 90%)
- Silicone grease for lubrication
- Replacement potentiometers or analog sticks if necessary
- Small brush for removing dust
- Compressed air for blowing debris out of tight spaces
Using the right tools ensures a safe and effective repair, especially for delicate sensor components.
Cleaning Analog Stick Sensors
Cleaning is often the simplest solution for minor drift issues. Over time, dirt or residue can interfere with sensor function. The following steps help restore smooth movement:
- Remove the controller back panel carefully and set screws aside.
- Inspect the analog stick area for visible dirt or dust.
- Use a cotton swab dipped in isopropyl alcohol to clean the sensor contacts gently.
- Clean the base and the moving parts of the stick. Avoid soaking sensitive electronic components.
- Allow the alcohol to evaporate fully before reassembling.
Cleaning should be done regularly as a preventive measure, especially if you play in dusty environments or sweat heavily during gaming.
Cleaning Tips
| Step | Action | Notes |
|---|---|---|
| Disassembly | Remove back panel | Keep screws organized |
| Dust removal | Use compressed air or brush | Avoid pushing dust further inside |
| Alcohol cleaning | Swab sensor contacts | Do not over-soak |
| Base cleaning | Clean stick base | Prevent buildup that causes friction |
| Drying | Allow alcohol to evaporate | Ensures no residue remains |
Experts recommend cleaning your controller every few months, even if it appears to function normally, to prevent future drift.
Lubrication and Mechanical Maintenance
Sometimes drift is caused by mechanical friction rather than sensor damage. Lubricating the moving parts of the analog stick can help:
- Apply a small amount of silicone grease to the base and spring areas.
- Rotate the stick in all directions to spread the lubricant evenly.
- Avoid applying grease directly on potentiometers to prevent sensor issues.Check for bent or cracked plastic guides and replace them if needed.
Proper lubrication ensures smooth stick movement and reduces stress on internal components.
Lubrication Checklist
| Area | Recommended Action | Tip |
|---|---|---|
| Stick base | Apply light silicone grease | Rotate stick to distribute |
| Springs | Check tension and alignment | Replace if weak |
| Guides | Inspect for damage | Replace if bent or cracked |
| Potentiometers | Avoid direct contact with grease | Clean only with alcohol |
Maintaining mechanical parts alongside sensor cleaning ensures a longer lifespan for your controller.
Calibration Techniques
Even after cleaning, drift can remain due to miscalibration. Most consoles and PCs allow controller calibration:
- On PlayStation, use the system settings to recalibrate the stick.
- On Xbox, use the Accessories app on PC or console to adjust dead zones.
- On Nintendo Switch, access Controller Settings and perform stick calibration.
Calibration can reduce minor drift by adjusting how the controller interprets stick input, but it may not fix physical sensor damage.
Calibration Tips and Guides
| Platform | Method | Notes |
|---|---|---|
| PlayStation | Settings → Devices → Controllers | Follow on-screen instructions |
| Xbox | Xbox Accessories App | Adjust dead zones for drift reduction |
| Nintendo Switch | System Settings → Controllers | Calibrate each stick individually |
| PC | Control Panel or Steam | Use calibration tool in controller settings |
Calibration is a helpful step even after cleaning or replacement to fine-tune stick responsiveness.
Replacing Analog Stick Sensors
If cleaning and calibration do not fix drift, the potentiometer or sensor may be worn out. Replacement steps include:
- Identify the exact type of analog stick or sensor your controller uses.
- Purchase an official or high-quality third-party replacement.
- Carefully disassemble the controller and remove the old stick or sensor.
- Install the new component, ensuring alignment with internal guides and springs.
- Reassemble the controller and test movement before closing fully.
Replacing the sensor restores proper stick function and eliminates drift caused by worn-out components.
Replacement Considerations
| Controller Type | Replacement Option | Notes |
|---|---|---|
| PlayStation DualShock/DualSense | Official or high-quality third-party | Check compatibility |
| Xbox One / Series X | Official Microsoft or third-party | Ensure correct spring type |
| Nintendo Switch Pro | Replacement kits | Includes tools for easy installation |
| Generic wired controllers | Universal sticks | May require soldering or careful adjustment |
Experts recommend replacing only if cleaning, lubrication, and calibration do not resolve drift, to avoid unnecessary expenses.
Preventing Analog Stick Drift
Preventive maintenance is better than frequent repairs. Key strategies include:
- Regularly wipe the controller to remove sweat and dust.
- Avoid pressing sticks too hard or applying uneven pressure.
- Apply light lubrication every few months to moving parts.
- Store controllers in dust-free, cool environments.
- Use replacement thumb grips to reduce wear on the stick.
These steps reduce friction and debris accumulation, preventing early wear of sensors.
Prevention
| Tip | Reason |
|---|---|
| Wipe controller weekly | Removes sweat and dust |
| Avoid excessive pressure | Prevents spring and sensor wear |
| Lubricate lightly | Ensures smooth movement |
| Store in safe area | Prevents dust and heat damage |
| Use thumb grips | Reduces friction and extends stick life |
Following preventive measures can extend the life of your controller and reduce the risk of drift significantly.
Troubleshooting Persistent Drift
Sometimes drift persists despite cleaning and calibration. In such cases:
- Inspect internal components for bent guides or loose springs.
- Check sensor connections to the circuit board.
- Consider replacing the entire analog stick assembly.
- Test the controller on multiple devices to ensure drift is not software-related.
Persistent drift usually indicates mechanical wear or faulty sensors that cannot be resolved through cleaning alone.
Troubleshooting
| Problem | Possible Cause | Suggested Action |
|---|---|---|
| Drift remains | Worn potentiometer | Replace stick or sensor |
| Uneven movement | Misaligned guides | Adjust alignment |
| Stiff stick | Lack of lubrication | Apply silicone grease |
| Drift on one device only | Software calibration issue | Recalibrate on other device |
Careful diagnosis saves time and prevents unnecessary replacement of functional parts.
Expert Advice
Michael Chen, a gaming hardware technician, notes: “Drifting analog sticks are often caused by dirt buildup or worn potentiometers. Cleaning, lubrication, and proper calibration usually restore function. Replacement should be a last resort.”
Following expert advice ensures your repairs are effective and your controller lasts longer. Proper maintenance, gentle handling, and regular cleaning prevent most drift problems.
Additional Tips for Long-Term Use
Even after fixing drift, keeping your controller in good condition is essential:
- Avoid gaming with wet or sweaty hands.
- Use protective cases for transport.
- Replace worn thumb grips promptly.
- Store controllers away from extreme temperatures.
- Perform regular maintenance every few months.
These steps help maintain smooth stick performance and prevent early wear of sensors and mechanical parts.
Conclusion
Analog stick drift is a common and frustrating problem, but it can usually be fixed with careful cleaning, lubrication, calibration, or replacement of sensors. Understanding the cause of drift, whether dirt, worn components, or misalignment ensures the correct fix is applied. Regular preventive maintenance, proper handling, and occasional calibration reduce the risk of drift and keep controllers responsive. Following these methods, even older controllers can function like new, providing smooth and accurate gameplay for years to come.
Extra Fix Recommendations for Analog Stick Drift:
- Reset controller settings to clear hidden calibration errors
- Increase dead zone settings slightly to reduce small drift
- Gently rotate the stick for a few minutes to loosen internal dust
- Tap lightly around the stick base to dislodge debris
- Use compressed air at different angles to clear deep particles
- Clean under the rubber cap where dirt often hides
- Check for tiny hair or fibers stuck inside the stick gap
- Use contact cleaner spray safe for electronics
- Re-seat ribbon cables inside the controller if loose
- Inspect solder joints on the analog module for cracks
- Replace only the potentiometer instead of the full stick to save cost
- Swap left and right stick modules (if identical) to test fault
- Check for firmware bugs causing false input readings
- Test controller on another device to confirm hardware issue
- Slightly lift and re-center the stick cap if pressed too tightly
- Ensure no plastic wear debris is stuck inside the housing
- Adjust internal stick tension manually if spring is tight
- Clean edges of the stick housing where friction builds up
- Use a soft brush instead of cloth for deeper cleaning
- Let the controller rest after cleaning to fully dry internal parts