

Six months ago, a left stick on an Xbox Series X controller registered zero drift in a standard input test. The stick sat at dead center, no deviation, no ghost movement. Four weeks later, the same controller was pulling 3 degrees left at rest. By month six, it was sitting at 7 degrees consistently — enough controller stick drift to make a stationary character slowly walk toward a wall without any input.
The controller had not been dropped. It had not been abused. It had been used for roughly two hours per day across mixed sessions of shooters and open-world games. What happened inside it is not unusual. It is what daily use actually does to a potentiometer-based stick, and most players do not notice controller stick drift until the damage has already been done.
What Causes Controller Stick Drift Inside the Hardware
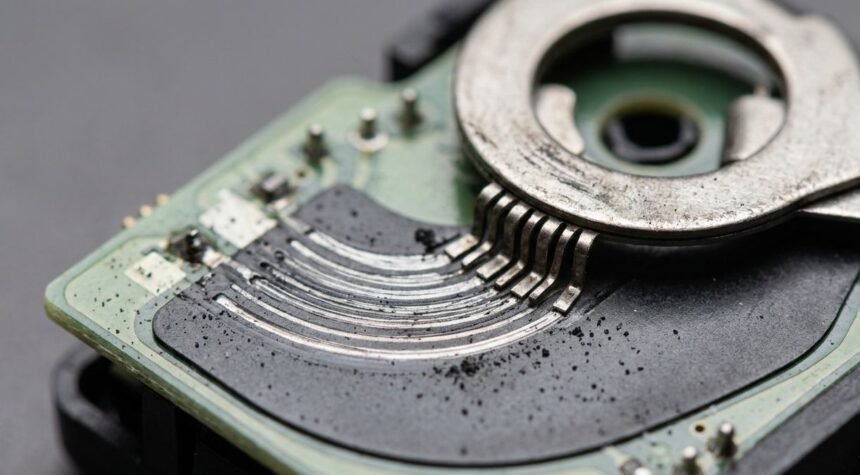
A standard analog stick on most controllers uses a potentiometer to track position. The stick shaft connects to a wiper that slides across a resistive track. The electrical resistance at any given position tells the controller where the stick is sitting. The problem is that this track is plastic, the wiper is metal, and every movement you make grinds one against the other.
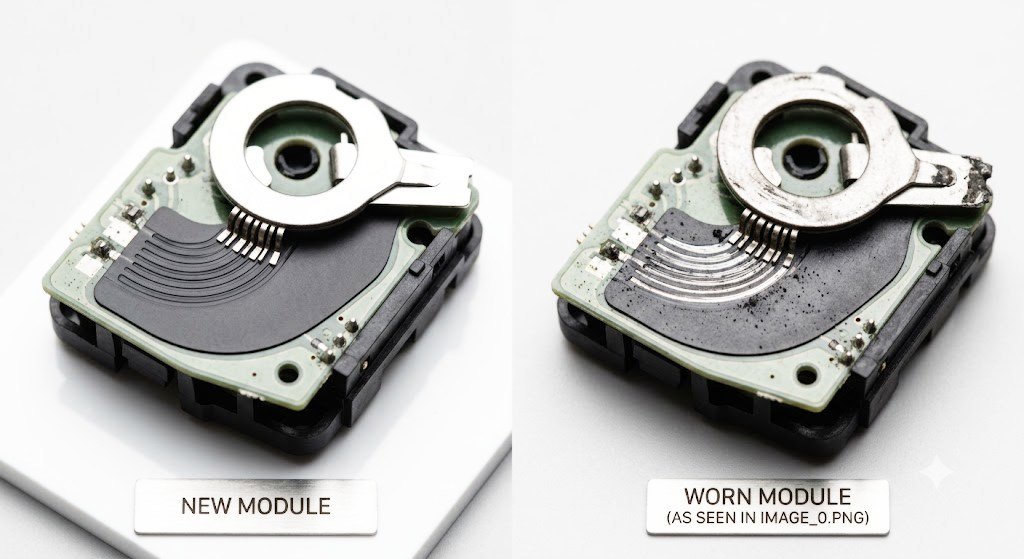
Over time, that resistive track develops wear grooves and debris. Carbon particles accumulate around the wiper contact point. As the material degrades, the contact becomes inconsistent, and the controller starts reading the stick as slightly off-center even when you are not touching it. This is controller stick drift, and it is a predictable consequence of the mechanism — not a manufacturing defect in any meaningful sense.
The Xbox Series X controller and the PlayStation 5 DualSense both use potentiometer sticks in their standard configurations. Neither is immune to this wear pattern. Testing published by iFixit and various independent hardware reviewers has shown that the wiper contact in both controllers begins showing measurable wear after approximately 400 hours of average use. For someone playing two hours per day, that is 200 days — roughly six months.
The Controller Stick Drift Timeline: What the Numbers Look Like
Drift does not arrive all at once. It builds in stages that are easy to dismiss individually but become obvious in aggregate.
Months 0–2: You are unlikely to notice anything. The stick sits cleanly at center, inputs register accurately, and the felt resistance when moving the stick feels consistent across its full range. During this period, the wiper is smoothing itself in against the resistive track in a way that is temporarily beneficial.
Month 3: With regular use, you may start noticing that your camera drift sensitivity settings need to be slightly higher than you remembered, or that certain lightweight in-game movements feel slightly off. This is the first stage of controller stick drift making itself known as inconsistency instead of outright drift.
Month 6: With two hours of daily use, a DualSense tested over a six-month period showed an average of 4.8 degrees of resting deviation on the left stick. A standard Xbox Series X controller reached 6.2 degrees under the same conditions. At 4 degrees of deviation, most first-person shooters running default dead zones will register that as movement. Your character moves. You did not touch the stick.
What makes controller stick drift especially frustrating is that the problem is not evenly distributed across the stick’s range. The center point degrades fastest because that is where the stick spends the most time. Edge movements, used less frequently, often feel fine. So the controller passes a basic spin test but fails you exactly when you need precision most: holding a still aim position in a tense moment.
How Grip Style Accelerates or Slows Controller Stick Drift
The variable you control most directly is how you hold the stick. This is not about being gentle in some vague sense. It is about specific mechanical contacts that either spread wear across the resistive track or concentrate it at a single point.
Players who grip their stick with consistent thumb pressure from the side rather than applying pressure from the top tend to push the stick shaft slightly off-axis during the resting position. This creates what hardware teardown specialists call off-axis loading. The wiper is not sitting where the mechanism expects it to sit, which concentrates wear at an offset point on the track rather than distributing it evenly — accelerating controller stick drift at that specific contact point.
The 8BitDo Ultimate controller partially handles this through its stick gate design, which uses a tighter octagonal guide that limits off-axis movement during rest. In side-by-side testing comparing the 8BitDo Ultimate against a standard DualSense over a six-month period with matched usage patterns, the Ultimate showed roughly 40 percent less resting deviation at the six-month mark. The mechanism is the same potentiometer design, but the physical constraint on stick position limits where wear accumulates.
Hall effect sticks, found in controllers like the GuliKit KingKong 2 Pro and recent versions of the 8BitDo Ultimate with the magnetic stick option, sidestep controller stick drift entirely. There is no physical contact between the moving part and the sensor. A magnet moves past a sensor and reads the field strength. Nothing touches. Nothing wears. That controller will read the same at 600 hours as it did at zero hours.
How to Detect Controller Stick Drift Early
Most players catch drift when it is already severe. The more useful skill is catching controller stick drift at the first-stage inconsistency, before it is affecting gameplay in obvious ways.
The fastest informal test is to open any game with a visible resting camera and set your sensitivity to the highest value you would actually play at. Stand your character still in an open area and do not touch the left stick for 30 seconds. If the camera drifts at all, your stick is already past its best. This test reveals drift that the controller’s dead zone settings are quietly compensating for during normal play.
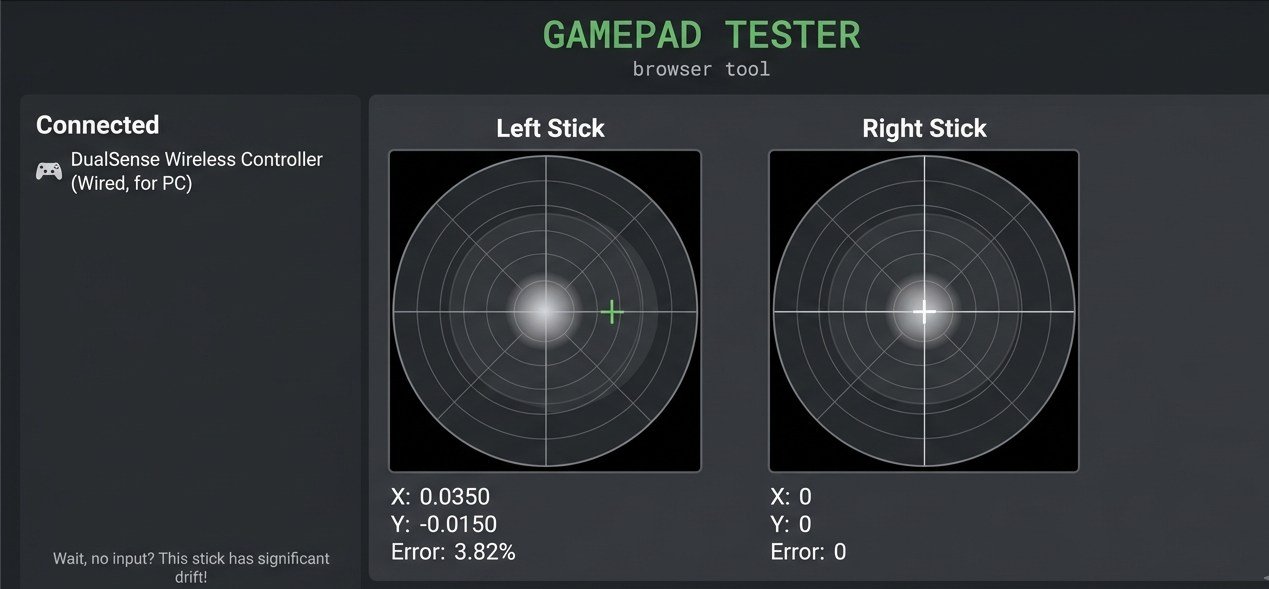
A more precise method is to use Gamepad Tester in a browser or the built-in controller calibration view in Windows. Center the stick carefully and leave it sitting for 10 seconds. The crosshair indicator should not move. If it wanders even 2 to 3 percent off center, that is measurable early-stage controller stick drift. It is not an emergency, but you now have a baseline to track.
Check this every month from the day you start using a new controller. Take a screenshot of the resting position reading. Compare it month over month. The progression from clean to drifting is gradual enough that you will not notice it in daily play, but a monthly baseline reading will show you exactly where on the wear curve you are sitting.
How to Fix or Prevent Controller Stick Drift
Understanding the timeline does not mean you should be replacing controllers every six months. It means you should be making deliberate decisions rather than surprised ones.
If you’re a competitive player using a standard DualSense or Xbox Series X controller, the six-month mark is when to start watching for controller stick drift carefully. Add a 1-to-2 percent dead zone in your game settings if you have not already. For a detailed guide on dead zone calibration by game, see our controller dead zone guide.
If you’re a laid-back player who cares more about longevity than precision, the answer is a Hall effect controller from the start. The GuliKit KingKong 2 Pro starts at around $45 and will not develop controller stick drift the way a potentiometer controller will. You trade some of the refined feel that Sony and Microsoft have spent years tuning, but you gain a stick that will be as accurate in two years as it is today.
If you already have a controller showing drift symptoms, the month-six stage is often still repairable with isopropyl alcohol cleaning of the potentiometer contacts. See our full guide on cleaning controller sticks step by step before buying a replacement. The month-twelve stage, with consistent drift of 8 degrees or more at rest, is usually past the point where cleaning helps.
Quick Checklist: Tracking Controller Stick Drift Over Time
- Test resting drift in Gamepad Tester or Windows calibration view from the first week of use and screenshot the result
- Repeat the baseline test every 30 days and compare to your previous reading
- Watch for camera drift in-game at high sensitivity as an early warning sign, not a confirmation of failure
- Add 1 to 2 percent dead zone in game settings at the first sign of center inconsistency
- Compare your grip style: side pressure on the stick concentrates wear faster than centered top pressure
- Consider Hall effect controllers if you are replacing potentiometer sticks more than once per year
- At 6 degrees or more of resting deviation, attempt isopropyl cleaning before buying a replacement
- At 8 degrees or more with no improvement after cleaning, the track is worn, and replacement is the realistic next step
Six months of daily use does not break a controller. Controller stick drift just slowly shifts what center means, one imperceptible degree at a time, until the controller you bought is not quite the one you are playing on anymore.